
Preparing the land
Whenever we begin a planting, preparing the land properly makes the steps that follow easier, and it is vital for the tree to grow well.
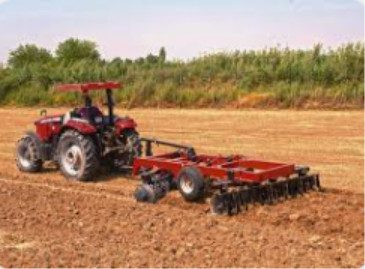
Depending on the farm's topography, access, timing and budget, the ideal before starting a planting is to loosen compacted soil with a mechanical harrow or a subsoiler. This lets us move the top layer of soil, loosening and aerating the ground, and it also makes marking out and planting much easier. However, this work requires flat or gently rolling terrain, and it must be done at least 2 months before the planting date so that weeds can be managed properly after tilling: subsoiling or harrowing will trigger countless weeds, which must be controlled with herbicides in good time before planting.
If some of the requirements above cannot be met and a mechanical harrow cannot be used, we recommend clearing the ground cover, depending on the type of cover and the type of planting. If the cover is grass, apply fluazifop-p-butyl at a rate of 6 ounces per sprayer, either over the whole area or at the planting points, covering at least 1.5 meters in every direction from where the hole will be. Always mix the herbicide with a sticker adjuvant, which helps the product spread properly and stay in place if it rains. Important: this systemic herbicide works properly only if the grass is no taller than 20 cm; otherwise the grass must be cut first and the herbicide applied afterwards.
If the cover in the area to be planted is broadleaf, the ideal is to apply glyphosate at least 2 months beforehand, at a rate of 5 ounces per sprayer together with a sticker adjuvant, so the product can do its work, observing the recommended waiting period before planting.
Never apply glyphosate or 2,4-D unless you are sure there are at least 2 months left before planting begins.
If the land is cleared less than 2 months before planting begins, the only approved herbicide is glufosinate-ammonium at a rate of 6 ounces per sprayer, always together with an adjuvant.
Marking out
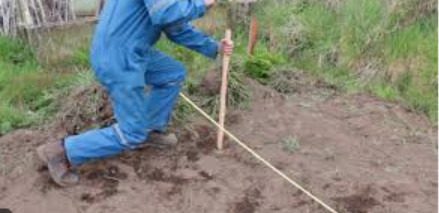
Marking out can be done in different ways depending on the experience of the people on site, but the spacing is always 5 m x 5 m (5 meters wide by 5 meters long), ideally using a rope that does not stretch and with at least 200 stakes ready before starting. It is important to set a baseline using a fence or road as the starting point, and to check with a tape measure that the distance between the fence and the baseline stays constant; from there, keep checking that the distances are correct and keep the rope at the same height above the ground so the margin of error does not grow. Be sure to leave at least 2 meters between the boundary or road and the start of the plantation.
Holes
Doing this job in good time before planting takes some of the pressure off the tasks that planting requires, and lets the holes be dug properly. It is important to use a suitable tool, which will depend on the type of ground and on the preparation already done. A shovel or narrow spade is most common; it always helps to use technology, so where possible we recommend an auger or post-hole digger, which gets the job done much faster and makes a much deeper hole. Although that is not strictly necessary, it helps the tree once planted because it sits in soft soil.
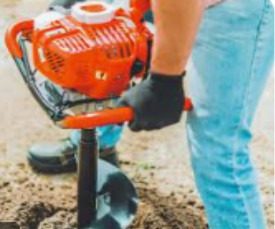
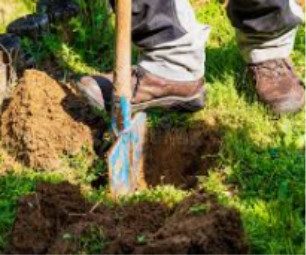
For practical purposes the hole should be about 30 cm deep and about 20 cm in diameter; a deeper hole is better, even if it has to be partly refilled afterwards. In periods of heavy rain, keep in mind that if this job is done far in advance, the holes can fill back in with the same soil.
Arrival of the trees
The trees usually arrive at the farm early in the morning, having been loaded the afternoon before. They often come in plastic crates, although they may come loose. It is very important to have enough people ready to unload the truck, ideally at least 6; with fewer, unloading is very slow and demanding, because the trees usually arrive damp and have to be arranged properly in the designated area. The trees should be counted on the spot to make sure the quantity ordered has arrived.
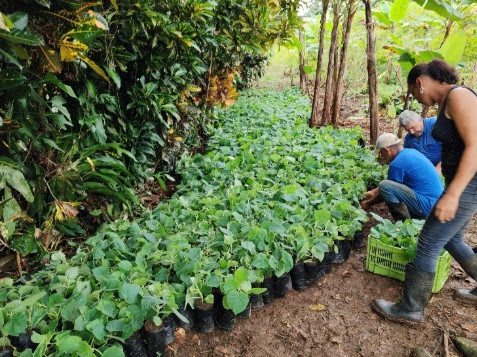
It is important to prepare a suitable place for storing the trees temporarily, close to the planting area, with at least 50% shade through the different hours of the day, that does not flood, where the trees are safe, and that has excellent access.
Once unloaded, arranged and counted, the trees should ideally stay there for 3 to 4 days, depending on conditions at the farm, so they adapt properly to the climate; this also gives us time to apply some treatments described below.
No more than 8 days should pass between the arrival of the trees and the end of planting.
Paulownia grows fast, so a long wait can encourage the stems to stretch and to grow toward the light (phototropism). This can produce plants with excessively long, thin stems, or stems less inclined to grow straight and evenly, which later makes planting and management harder. These conditions can affect the quality of the plant and its potential for development once it is established in the field.
First applications
Taking advantage of the trees all being together once they are unloaded, we make the first application of products, to ensure better survival and help the trees adapt. For this, depending on the quantity, the mix is prepared in half a sprayer (10 liters) of water, to which we add:
- 1 ounce of biostimulant (product recommended by your advisor)
- ½ ounce of imidacloprid (insecticide)
- ½ ounce of deltamethrin (insecticide)
- 3 ounces of molasses (energizer)
- ½ ounce of adjuvant (sticker and spreader)
We mix this very well and make at least 3 applications during the time the trees are in storage.
Planting
Once the 3 or 4 days of storage have passed and we are sure the tree circles (the cleared ring of ground around each planting spot) are clean and the holes are finished, planting begins. From experience, and depending on the number of trees to be planted, enough people are needed (at least 5 people for every 1200 trees, which is equivalent to 3 ha); this makes the work less demanding and lets it be finished in no more than 3 days.
- 2 to 3 drums
- Plastic cups
- Blades or a utility knife
- Plastic crates
- Buckets, at least 5
- Complete chemical fertilizer recommended by your advisor (200 g per tree)
- Soil amendment (500 g per tree)
- Water retainer: 1 kg for every 400 trees. The product is mixed with water at a rate of 1 kg to approximately 170 liters of water, for a mix of 200 liters and a dose of 500 g per tree.
- Root-improvement combo
Crew
To manage the crew well, the activities below should be carried out at the same time:
- If the owner is not present at planting time, it is extremely important to delegate the role to someone who will supervise the whole planting process.
- Depending on the number of hectares to be planted, 2 or 3 people distributing trees to their holes.
- At least 3 or 4 people planting trees.
- 1 or 2 people applying the water retainer.
Once planting is finished, the same crew should carry out the liming, the fertilizing and the application of the plant-health combo.
Planting process
The day before planting, put the water retainer (powder) into a drum filled 80% with water, making sure it sits there for at least 12 hours before planting. On planting day, the resulting mixture (a gel) is carried in buckets and 500 grams of it are placed in each hole; this helps the soil hold more moisture in dry spells.
Planting is done once the tree has been placed next to its hole. Open the bag with a utility knife or blade by making a cut down the side, take the tree out carefully, keeping the roots and soil together as far as possible, and set it upright in the hole with the top of the tree's soil level with the top of the hole. This prevents the tree from sitting below ground level, which would cause surface water to pool when it rains. Press firmly and evenly around the tree to compact the soil and push out any remaining air, so the tree is properly set.
Fertilizing and liming
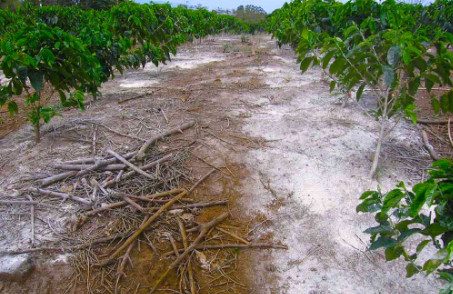
As soon as planting is finished we go straight on to liming, which means adding soil amendment (lime) at the recommended rate, on average 500 grams per tree. The amendment is applied immediately after planting and evenly over the whole tree circle, trying as far as possible not to let any product fall on the tree. It is essential not to saturate particular spots, because we need the product to soak in as quickly as possible; this can take 2 to 3 days depending on moisture and rainfall. We will always apply the product recommended by the technical team, according to availability.
Once the soil amendment has been applied, we wait about 5 to 7 days and then apply the corresponding fertilizer, approximately 200 grams per tree, over the same area where the amendment was applied. It is essential to apply it evenly.
With this step the planting process is complete, and we move on to continuous management and monitoring of our plantation.