
Coppicing (cutting the tree back to the base) is applied only to trees whose shape and growth are not as desired: for example, the stem has grown crooked, the tree has not reached a minimum height of 4 m, or the stem broke in the first year of growth, among other reasons. This cut is best made as soon as the tree shows small green buds at the top of the stem, usually at the start of the rainy season (in some cases in February; consult World Tree staff first). Where the plantation as a whole did not exceed 4 m in height, the entire plantation should be coppiced to produce better-quality trees.
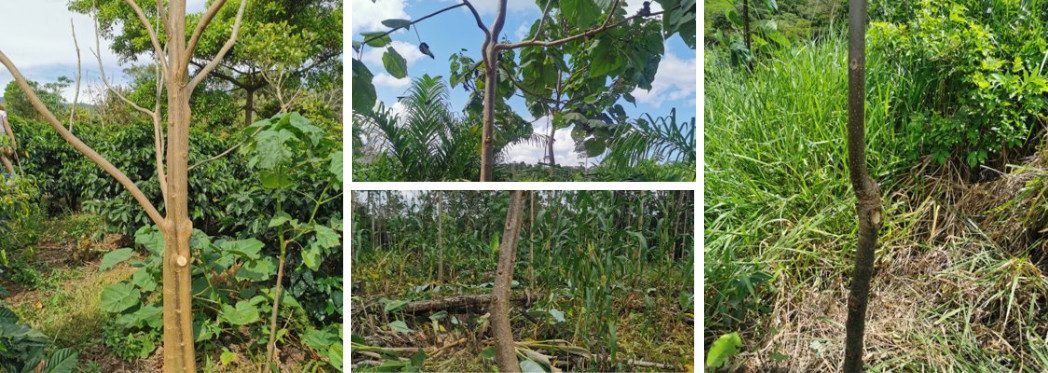
Before coppicing, the tree circles must be cleaned and the fertilizer recommended by our advisors applied.
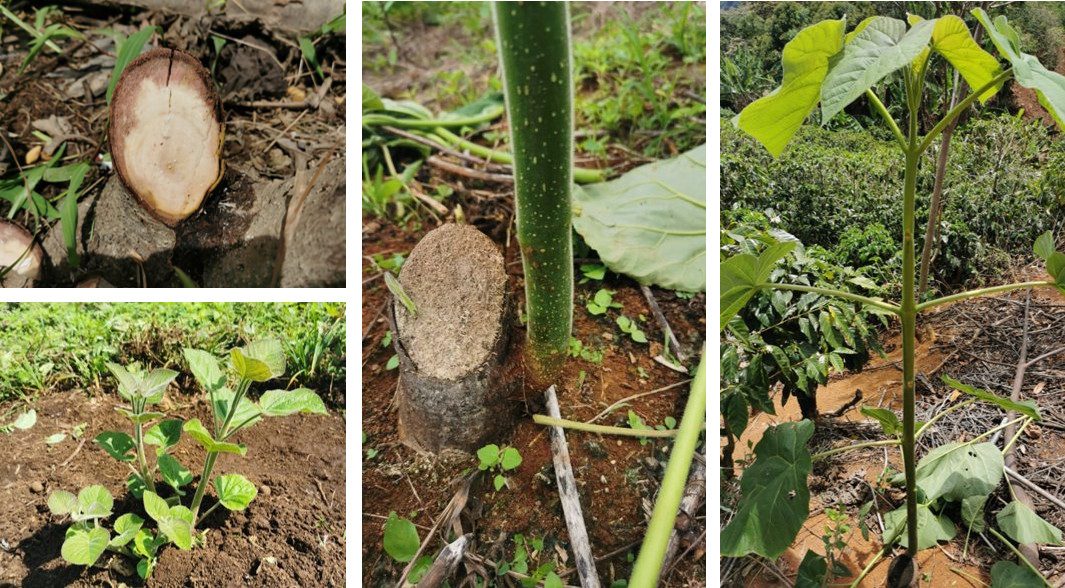
Cut the stem as close to the ground as possible, at an angle (commonly known as a slanted or "salami" cut), to prevent water from pooling on the stem. Even on larger stems, you should leave a stump of less than 1" (2.54 cm) above the ground. Stems cut this way will produce new shoots close to the ground, and these will be firmer against the wind as they develop.
After coppicing, the best resprouts must be selected until only one remains, which will be our future tree.
Preparing to coppice
- First, remove all weeds from the tree circles for better access and for applying fertilizer. Keep weeds farther out cut low, as they will compete for sunlight, nutrients and water while the tree is growing.
- Follow-up weed control may be needed in the 3 to 4 weeks after coppicing. Do not fertilize if the weeds have not been cleared! In this period the new shoot can grow to about 30 cm tall. It will have soft new leaves and green bark low down, so take special care that these do not come into contact with herbicide. Likewise, it will help to cut back or kill the weeds again before the second dose of fertilizer later in the season.
- Cut as close to ground level as possible without damaging your cutting tools. Even on larger stems (>10 cm in diameter) you should be able to leave a stump of less than 2.50 cm above the ground. On small stems, try to keep the stump under 1.5 cm high. In some cases a strong shoot may come up from below ground near the stump; these are preferable to others if they are of equal or better vigor, as they will be well anchored. Low-cut stumps will form new shoots close to the ground, and these will be firmer in the wind as they develop than shoots that start from the top or edge of the stump.
- Cut the stem at an angle (a slanted cut) so that water does not collect on the trunk.
- What NOT to do: stumps cut too high will encourage multiple shoots and weakly anchored stems.
- What to do: cut the stumps at the right time and very close to the ground.
- After making the cut, it is advisable to apply a tree pruning sealer.
Tools
- Use a sharp, sanitized tool that can cut cleanly through the stem without too much effort.
- It is MANDATORY to disinfect cutting tools every time a tree is pruned. Disinfection can be done with carbolic disinfectant or alcohol, to reduce the spread of diseases (if any) from one tree to another.
- For stems under 2.50 cm in diameter, long-handled loppers with a bypass cutting action are suitable. For stems over 2.5 cm in diameter at the base of the plant, a curved pruning saw with long teeth works well. The pruning saw will also be useful for removing branches later in the season.
- Avoid hand or hydraulic shears with a crushing action: they will crush or lift the bark of the stump, create deep cracks in it, or leave wood fibers sticking out or left behind. Cracks in stumps and torn fibers increase moisture loss from the cut surface in dry climates, or harbor fungi and insects in wetter climates. The aim should always be a clean cut with minimal damage to the bark remaining on the stump.
- With all tools, try to keep the cutting edge from touching the ground. Soil particles and rock fragments will quickly dull your tool.
- On thicker stems a chainsaw can also be used. We recommend saws of under 60 cc because of their weight, and a new chain for the cutting work. It is essential to use vegetable oil (cooking oil) in the oil reservoir to lubricate the chain, because the chain-lubricating oil or used motor oil normally used "burns" the cut and poisons the tree, so that it does not resprout. The cut should be made at a 45° angle, no more than 5 cm above the ground. As with other cutting tools, the disinfection described above is required.
Choosing the main shoot
- The choice should be made just before the tallest shoot reaches 40 cm in height. Do not wait any longer; otherwise you will end up with a leaning trunk and lower-value timber.
- Within 20 to 30 days after coppicing, the plant will produce 3 to 4 resprouts, of which 1 or 2 should be discarded in the first week of growth (the weak ones and/or those on the edge of the stump). A week later the main resprout is selected, leaving only one per plant. The main resprout will be the one that is straightest, most vigorous, and coming from the lower part of the trunk or from the root.
- It is important to make this choice a couple of weeks after the cut. If shoot selection is left a few weeks later, when the shoots are over 60 cm tall, they will already be leaning away from one another to get as much light as possible. In that case the bend in the lower stem will be a permanent feature of the future tree's shape. Leaning trees have tension wood in the stem, which reduces timber quality and can cause sawn timber to warp.
- In the same way, do not choose the main shoot too early. Let the main shoot clearly show its dominance before choosing which one to keep.
Thorough site preparation and timely coppicing will come together to produce a healthy plantation of vigorous trees that will grow strongly into valuable, tall, straight trunks. With the right conditions and your diligent care, your trees will surprise and delight you. By the end of the season you will be enjoying the cool, leafy shade of a tree that, with luck, is much taller than you.
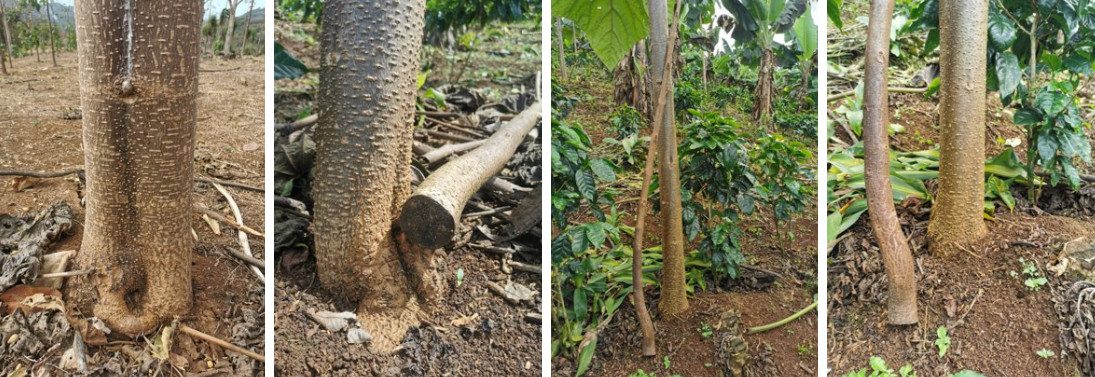
Applying fertilizer before coppicing or at the start of the second growing season
- The trees should be fertilized before coppicing; a complete chemical fertilizer should be applied. The ideal fertilizer for your trees should be chosen according to our technical team's recommendations.
- The trees will respond best if they receive at least two doses of fertilizer during the growing season. The recommended second and third applications are a complete chemical fertilizer.
- Spread the fertilizer evenly on the soil surface in a circle with a radius of about 1 m, starting about 30 cm away from the stump and the new stem. Do not let fertilizer granules touch the bark directly or build up near the stump.